Embroidery: Stitch Guide Help
Whether you are making a hoop for display or adding embellishment to a garment, hand embroidery is a fun and relaxing way to create unique and beautiful art with thread and fabric. If you are new to embroidery, you may want to read about Pattern Transfer Methods and how to Prepare Your Fabric and Thread before beginning a project.
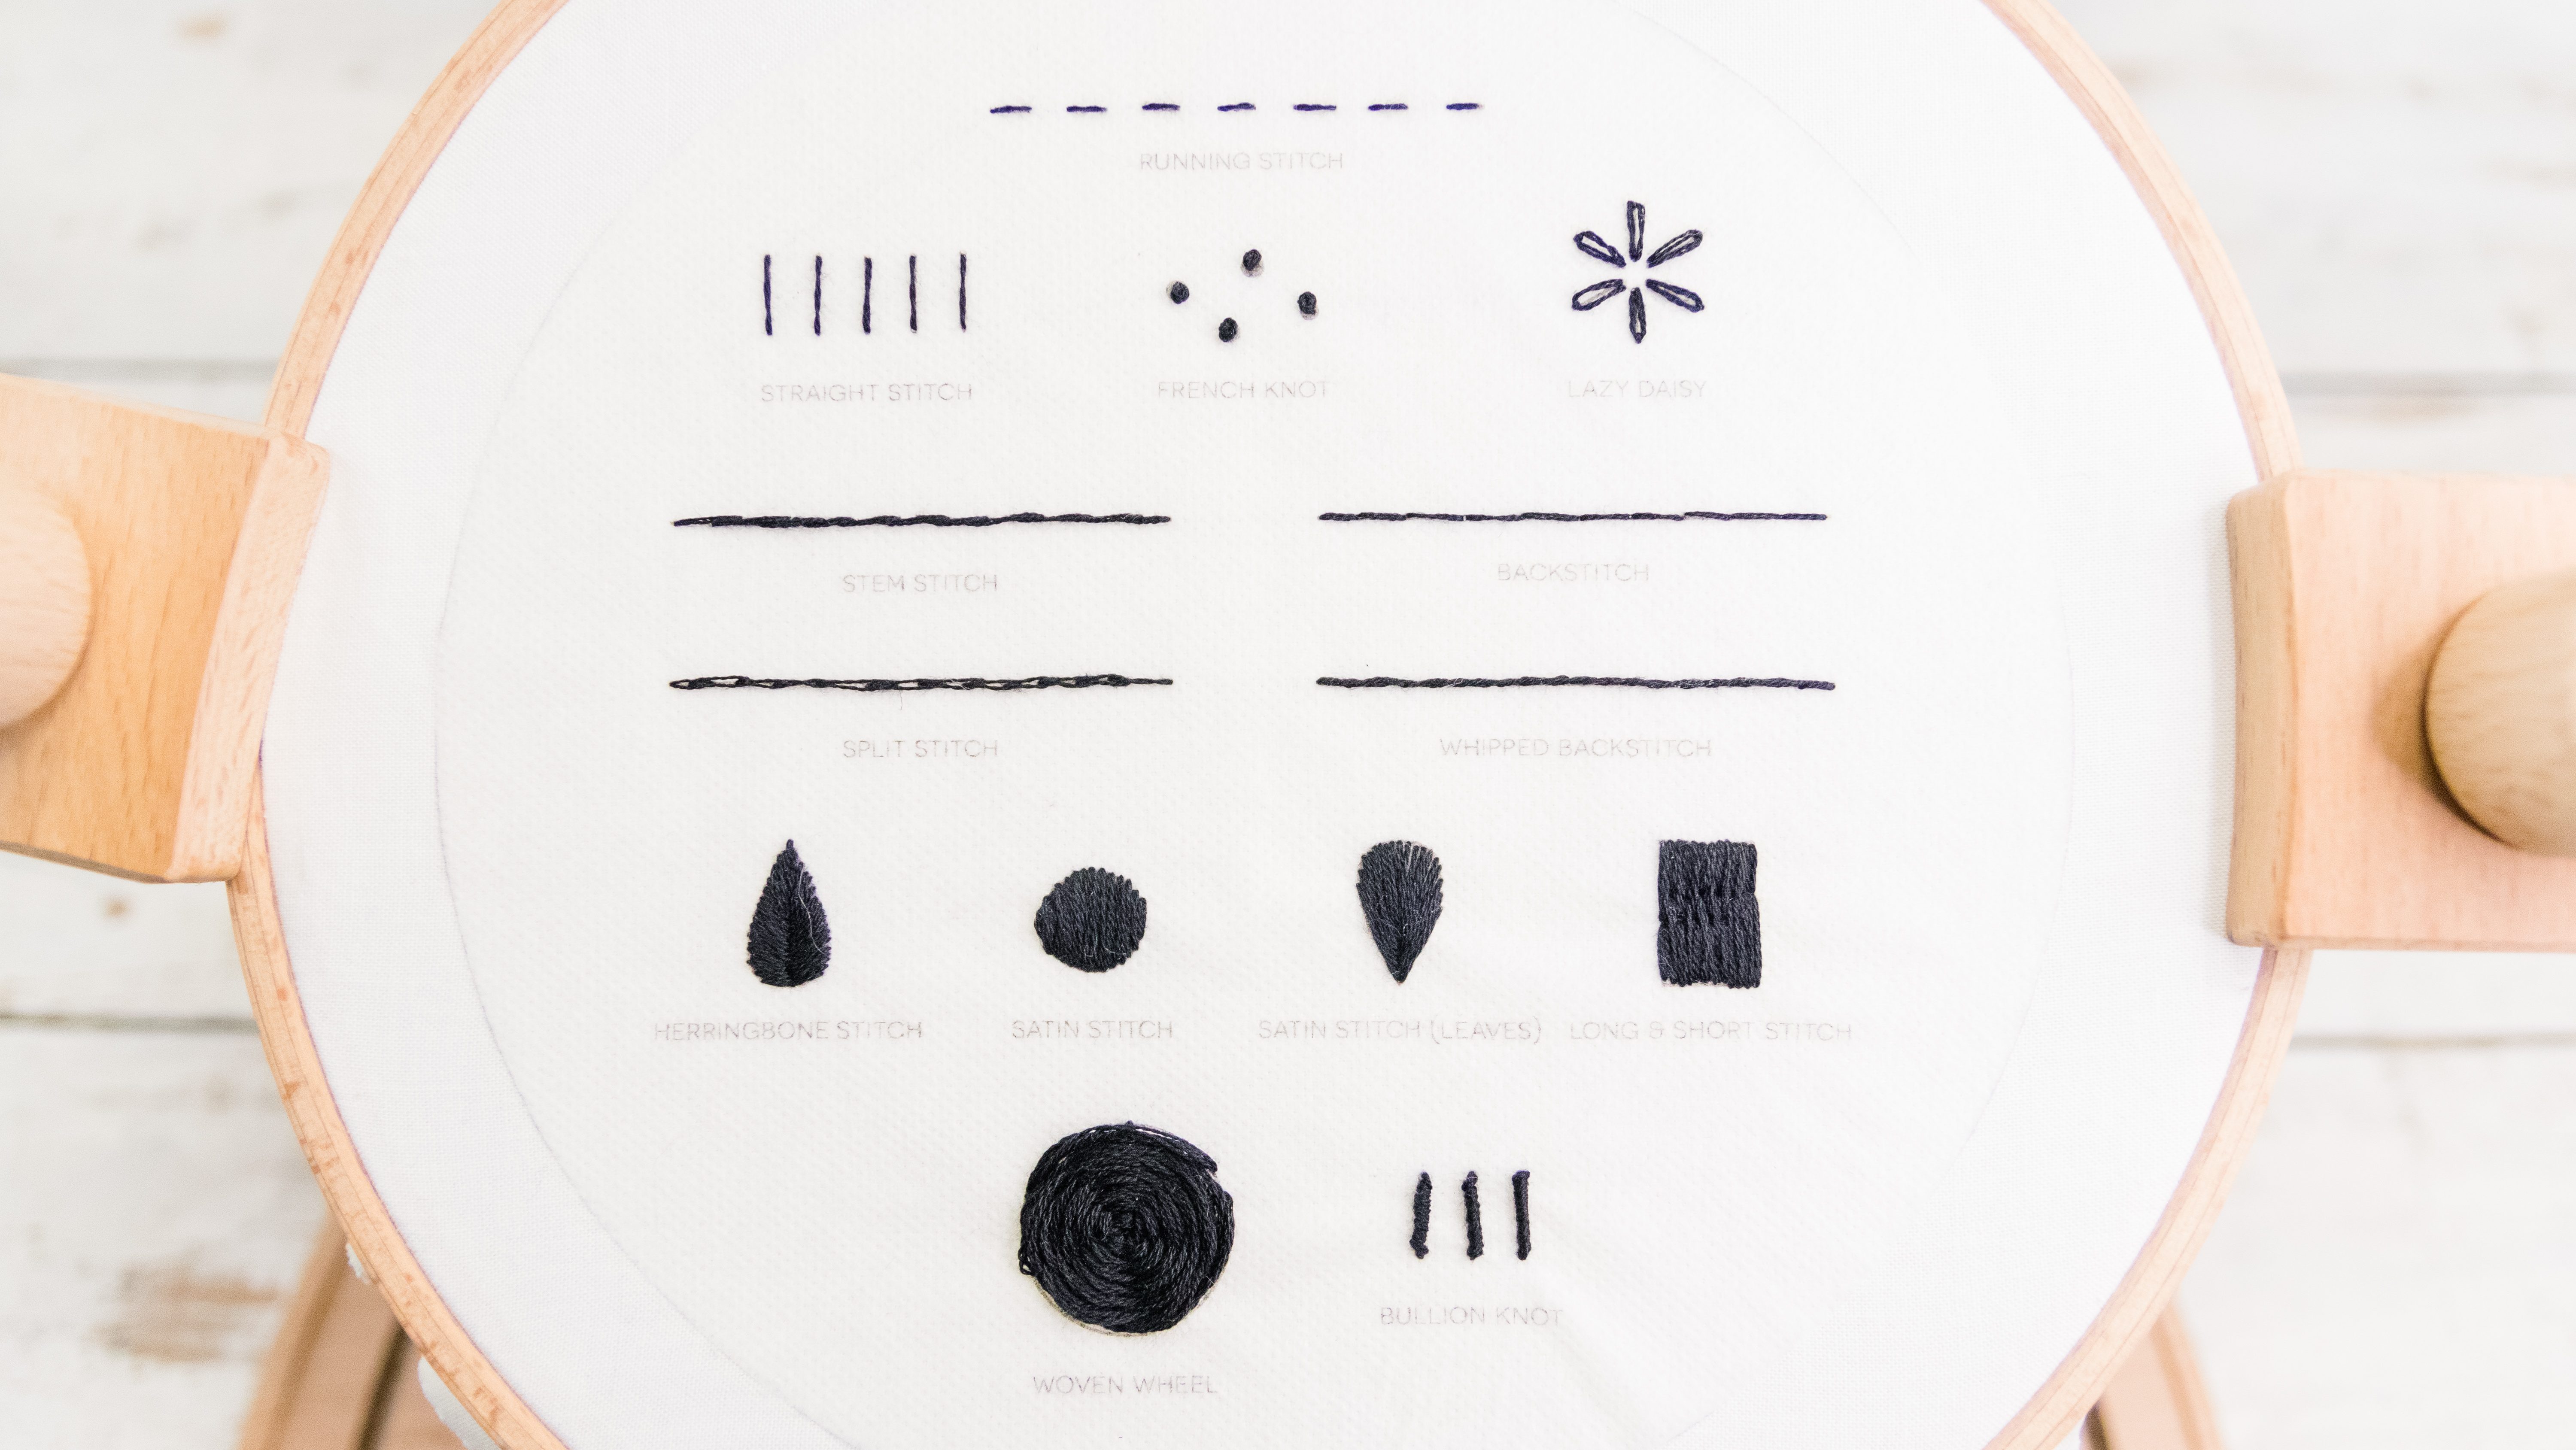
Although there are many different stitches and styles of embroidery, here are a few examples of some of the more common stitches you will come across. If you would like to practice these stitches, you can print a copy of the Stitch Guide here.
Running Stitch
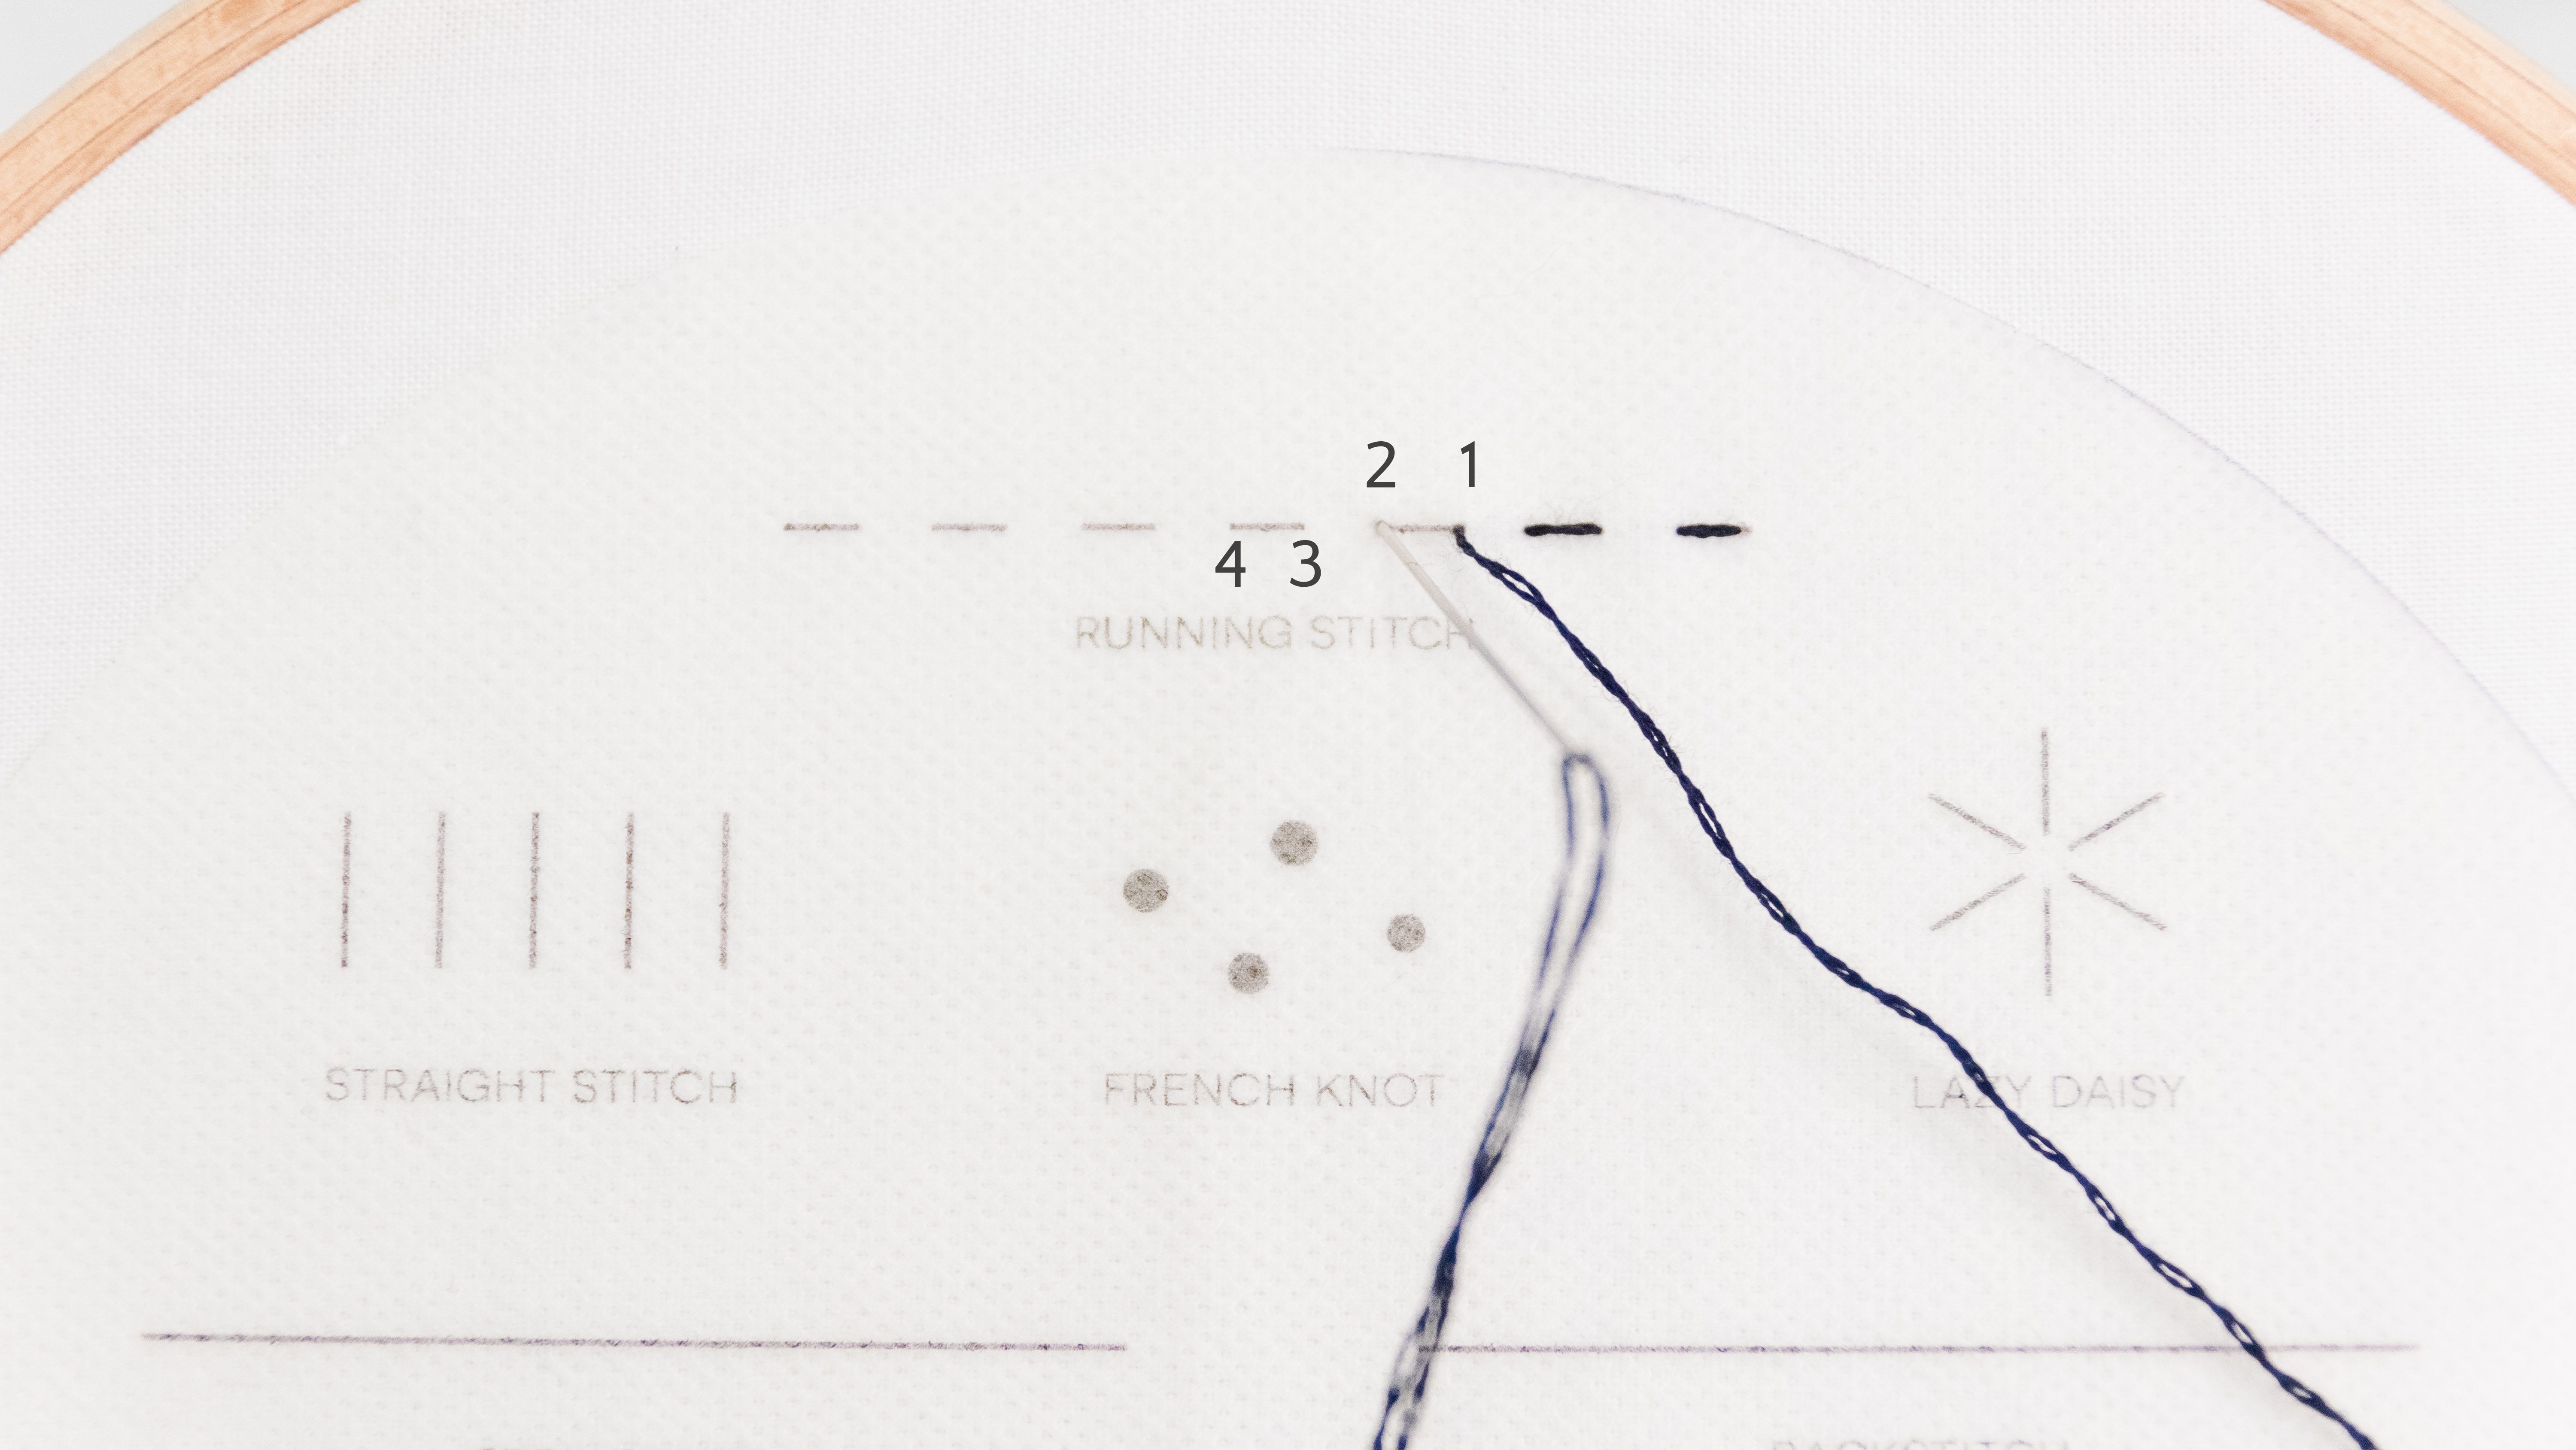
Bring needle up at 1 and back down at 2. Move left and bring needle up at 3, then back down at 4.
Straight Stitch

The straight stitch can be made in any length and in any direction. It is generally used to cover straight design lines. Bring needle up at 1 and down at 2.
French Knot


Bring needle and thread up at 1. Hold the thread taught at 2 with one hand. Starting close to the where the thread exits the fabric, wind the thread around the needle twice. Insert needle back into fabric at 3, right next to 1, while continuing to hold the thread secure with the other hand.
Lazy Daisy


Bring needle out at 1. Insert back down into the same hole (or as close to it as possible) and pull needle back up at 2; ensuring that the thread is looped around the exiting needle. Insert the needle at 3 over the chain loop, then back out at the beginning point for the next loop at 4. Repeat in a circular pattern to create the petals of a flower.
Backstitch

Bring needle up at 1 and back down at 2. Move left and bring needle up at 3, then back down at 1.
Stem Stitch

Bring needle up at 1 and down at 2. Bring needle back up halfway between 1 and 2 at 3, next to the previous stitch.
Split Stitch

Bring needle and thread up at 1 and down at 2. Bring the needle back up at 3, between the previous stitch to split the threads. Then insert the needle down at 4 to make the next stitch. Repeat steps 3 and 4 to create a thin chain stitch appearance.
Whipped Backstitch


Make a backstitch by bringing the needle up at 1 and back down at 2. Move left and bring needle up at 3, then back down at 1. When the backstitch line is finished, weave the thread back through the stitches in a whipstitch motion, making sure to enter the backstitch on the same side each time. Finish by inserting the needle at the end of the line.
Herringbone Stitch


Bring needle and thread up at 1 and down at 2 in order to establish the tip of the shape. The needle then comes up at 3 close to the first stitch, and down at 4 just to the right of the center line. Pull the thread back up at 5, directly across from 3, and back down to 6 just to the left of the center line. Repeat the 3 to 6 sequence, creating a tiny overlapping pattern in the center, until the leaf shape is filled.
Satin Stitch


Bring needle up at 1, down at 2, then back up at 3; right next to 1. Place stitches close together to fill in the area.
Satin Stitch (Leaves)


This version of the satin stitch is similar to the Herringbone Stitch, but more elongated. Bring needle and thread up at 1 and insert at 2, halfway down the leaf. The needle then comes up at 3, close to the first stitch, and down at 4, ending just below the first stitch. Pull the thread back up at 5, directly across from 3, and back down to 6. Repeat the 3 to 6 sequence, placing stitches close together, until the leaf shape is filled.
Long and Short Stitch


Begin at 1, from the top of your shape, and create a long stitch down to 2. The needle then comes up at 3 close to the first stitch, and down at 4, making a shorter stitch. Repeat steps 1-4 until the top of shape is filled in. If making more than one row, make long stitches in each gap made by the short stitches by bringing needle up at 5 and down at 6. Continue step 5 and 6 until the shape is filled.
*Using slightly different shades of thread for each row will create a blended color effect.
Bullion Knot


Bring needle and thread up at 1. Insert at 2 and exit out at 1, but do not pull the needle all the way through. Wrap the thread around the shaft of the needle five to seven times (depending on the distance between points 1 and 2). Carefully pull the needle the rest of the way through the fabric and the wrapped thread, trying not to distort the twists. Then pull your thread towards point 2 until the coil of thread is laying flat between points 1 and 2. Insert the needle and thread back into 2 in order to secure the bullion stitch. Perhaps one of the trickiest of stitches, the bullion knot can be created in straight lines, or made in a round shape to make a bullion rose.
Woven Wheel


Use the straight stitch to create at least 5 spokes that begin at the outer wheel and end at the inner wheel. Make sure that there is an odd number of spokes in order to create the woven rose pattern. When the lines are finished, bring the needle back up near a spoke base. Staying on the right side of the fabric, weave the thread over and under the straight stitches in a circle. For a full and textured rose, use a thicker floss and loose tension. When there is no more room to wrap around, insert the needle back into the fabric near the top of one of the wheel spokes.
Now that you know some of the basic stitches, be sure to check out all the embroidery patterns available at Wild Seeds Patterns to start practicing them in designs!