1963 Senior Prom Barbie by Rachel Crawford
With the release of the Barbie movie, everyone is once again falling in love with the fashion doll icon. And Halloween is sure to reflect this with many children (and adults) wearing costumes of their favorite Barbie wardrobe. Pink dresses and beautiful accessories may be what is most associated with Mattel's most profitable toy line, but Barbie has had many well known outfits and looks over the years.
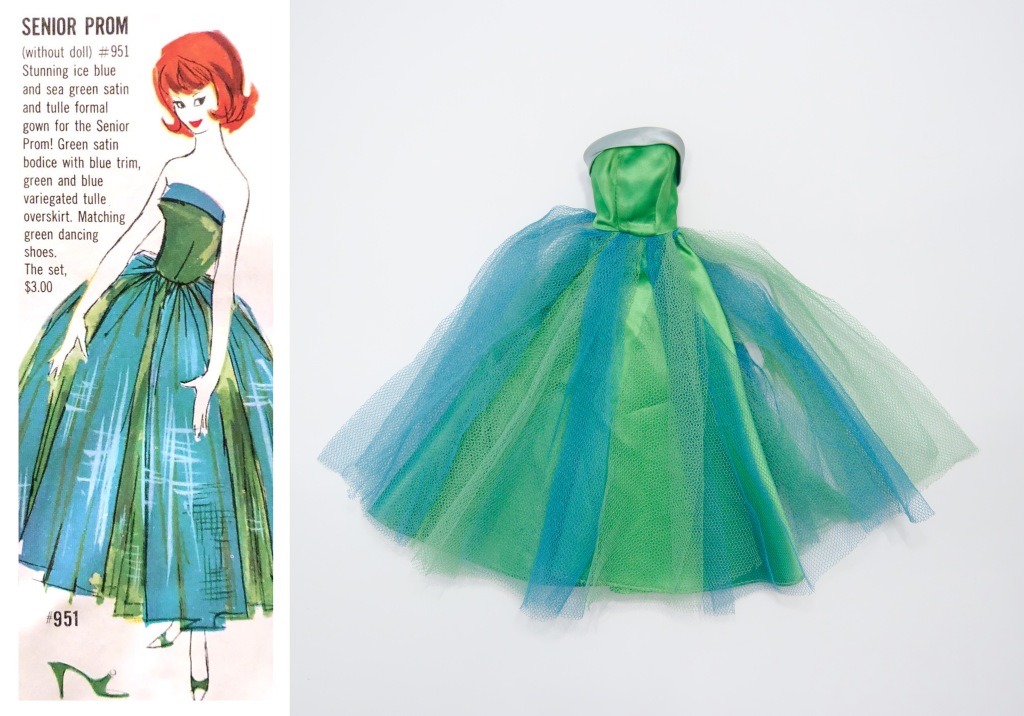
My grandmother was actually a fashion illustrator and doll collector, having many original Barbie dresses in her possession. One that I still own and admire is the 1963 "Senior Prom". This emerald green gown has a light blue satin on the top bodice, and a tulle overlay in teal blue and green. This dress was one of my favorites to play with when I was growing up. So it seemed only fitting to make my own version for my daughter to wear.
To create this look, I used the Camellia dress from Wild Seeds Patterns. With the rounded neckline and straight waist options, I followed the instructions from the tutorial, sewing together the bodice center and sides to make the main and lining pieces.

Then I folded those pieces in half and drew a gentle curve from the top center down to the arm hole.
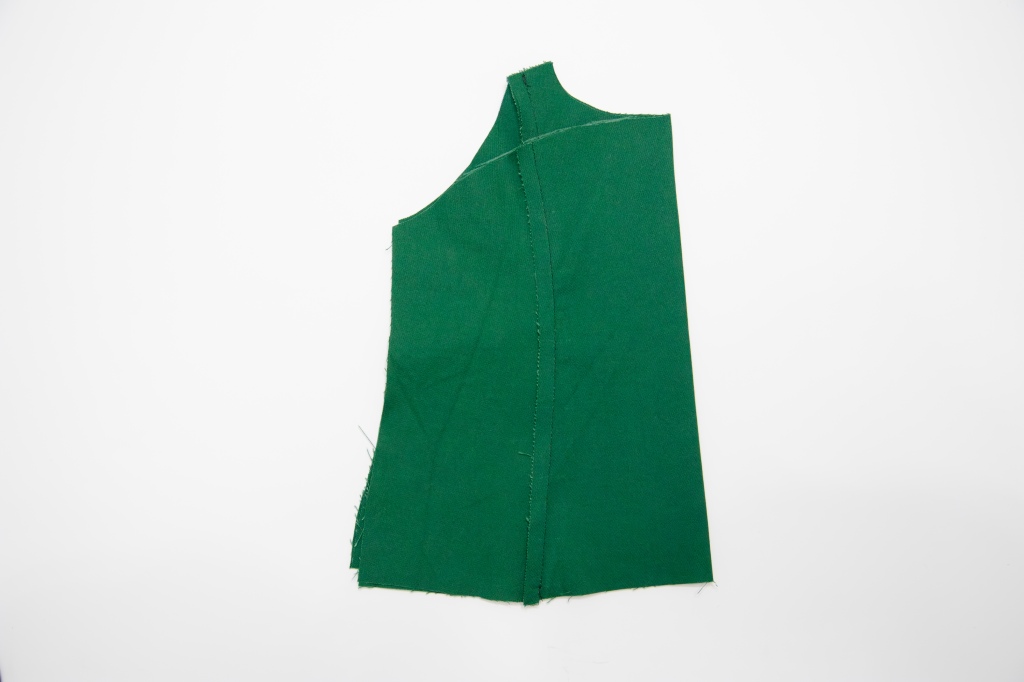
After cutting on the line, I traced along the edge of the top onto a piece of paper. Carefully pulling the bodice straight down from that first line, I traced the top curve again.

Connecting the sides of those two curved lines, I now had a perfect pattern piece to create the folded over fabric of the light blue satin top. You can make your piece longer or shorter, depending on the size you make, but remember to account for the seam allowance when sewing.

Cutting out two pieces of fabric from the light blue satin, I placed them on top of each other, right sides together, and sewed along the bottom curve.

Turning the pieces right side out, I gently ironed the satin flat. The blue satin is then placed on top of the green bodice and carefully basted together along the top edge. Then I followed the standard Camellia tutorial for the rest of the bodice construction. I ended up using a clear elastic in place of the straps to give the appearance of a strapless dress, but I didn't need to change the length of the straps at all.

When constructing the skirt, I sewed the "midi length" skirt pieces together and finished the bottom hem. I cut out sections from my rolls of green and blue tulle in the length of the skirt, and then pinned them in alternating columns to the top of the skirt. Making the double row of gathering stitches over all of the layers will hold them in place.

Once the skirt and tulle were gathered to the width of the bodice, I sewed them together as directed in the tutorial.

This dress turned out exactly as I had hoped and imagined. And my darling daughter looks gorgeous in her vintage style Barbie fashion.


